Monthly Archives: February 2012
Using WordPress on AWS EC2 Free Tier
Here is a guide on how to setup WordPress on Amazon EC2 Free Tier
Setup
-
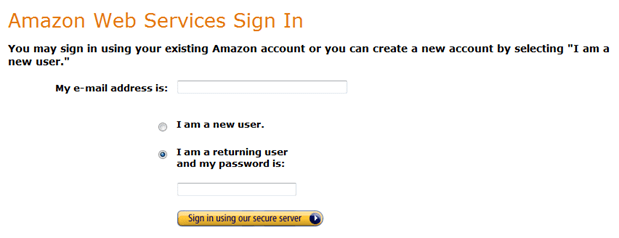
Sign up for a AWS Account at http://aws.amazon.com/

-
Sign up for a Amazon EC2 at http://aws.amazon.com/ec2

- Sign into the AWS Console
-
Choose a Region before launching your new EC2 instance.

- Create EC2 Linux Micro Instance for WordPress:
- To start a new EC2 instance click on the Launch Instance button.

-
In the “Request Instances Wizard” tab to the Community AMI’s then filter using “wordpress” then choose the AMI:
bitnami-wordpress-3.1-0-linux-ubuntu-10.04-ebs (ami-30f18f62)

- For your Free instance, choose the number of instances: 1, Availability Zone: No Preference and Instance Type: Micro (t1 micro, 613MB).

- Shutdown Behavior option should be stop, and all other options Use Default.

-
Add in a tag key = Name and value = Webserver.

-
Create a new Key Par call it the name of the website then create and save this file somewhere on your local machine that can be grabbed latter. E.g xyz.pem

-
Adjust Security Groups,
Add rules for SSH, HTTP, HTTPS but leave the source as 0.0.0.0/0

- Now Lunch the instance

- Assign Elastic IP then Associate Address with your EC2 Instance
- Click on Instances within the EC2 console to find the Public DNS.

- Install Open SSH on Windows
-
Set pem file to Read by owner
chmod 400 xyz.pem
-
SSH in to the instance
ssh -i xyz.pem bitnami@ec2-<public DNS>.ap-southeast-1.compute.amazonaws.com
-
Move WordPress to run at the root of the apache web server by editing httpd.conf file using vi
sudo vi /opt/bitnami/apache2/conf/httpd.conf
DocumentRoot “/opt/bitnami/apache2/htdocs”
To
DocumentRoot “/opt/bitnami/apps/wordpress/htdocs”
<Directory />
Options Indexes MultiViews +FollowSymLinks
AllowOverride All
Order allow,deny
Allow from all
</Directory>
<Directory “/opt/bitnami/apache2/htdocs”>
To
<Directory “/opt/bitnami/apps/wordpress/htdocs”>
Comment out:
#Include “/opt/bitnami/apps/wordpress/conf/wordpress.conf”
-
Create an .htaccess file for WordPress
This also enables you to have pretty permalinks like myblog.com/tour
Add .htaccess file to WordPress dir
in /opt/bitnami/apps/wordpress/htdocs/.htaccess
# BEGIN WordPress
<IfModule mod_rewrite.c>
RewriteEngine On
RewriteBase /
RewriteCond %{REQUEST_URI} !=/server-status
RewriteCond %{REQUEST_FILENAME} !-f
RewriteCond %{REQUEST_FILENAME} !-d
RewriteRule . /index.php [L]
</IfModule>
# END WordPress
-
Configure WordPress to know its own DNS entry
sudo vi /opt/bitnami/apps/wordpress/htdocs/wp-config.php
define(‘WP_HOME’, ‘http://www.ringio.com’);
define(‘WP_SITEURL’, ‘http://www.ringio.com’);
-
Install Filezila
Public DNS
SSH Username: bitnami
Password: <Blank>
-
delete the /opt/bitnami/updateip file. Otherwise, restarting the instance, Bitnami resets the wp_options values to the Public DNS server name.
sudo rm /opt/bitnami/updateip
-
Install EMS MySQL Manager
How to Connect to BitNami MySQL Remotely
-
Run this SQL script to set the Pubic IP Address with WordPress
update wp_options set option_value = ‘http://www.agileweboperations.com’ where option_name in (‘siteurl’, ‘home’);
-
Configure WordPress with the Pubic IP Address
sudo vi /opt/bitnami/apps/wordpress/htdocs/wp-config.php
define(‘WP_HOME’, ‘http://www.ringio.com’);
define(‘WP_SITEURL’, ‘http://www.ringio.com’);
- Reboot the instance
- In your Browser type the public ip and see if WordPress is running correctly at Root Directory
-
Login into Woresspress using default bitnami username
Username: user
Password: bitnami
- Add a new use into WordPress with Role of Administrator
- Then remove default bitnami username from WordPress by login in as your new username
- Make a DNS A record for the domain host provider, and use the elastic IP.
Migration
- Both wordpress on your old site and on AWS are the same due to database compatible issues
-
Copy your \wp-content\upload from your old site locally to reload on AWS
sudo chmod 755 /opt/bitnami/apps/wordpress/htdocs/wp-content/
Install and download all plugins to your AWS Worspress instance
- Download or install your old theme and plugins
- Export your Old WordPress database using MyPHPAdmin
- Run the Export SQL Script on the AWS WordPress Instance using your Remote SQL Manager
-
The rerun the SQL script to set the Pubic IP Address with WordPress
update wp_options set option_value = ‘http://www.agileweboperations.com’ where option_name in (‘siteurl’, ‘home’);
To Finish
-
When your domain has delegated run this script again with your domain
update wp_options set option_value = ‘http://www.website.com’ where option_name in (‘siteurl’, ‘home’);
-
Configure WordPress with the Pubic IP Address
sudo vi /opt/bitnami/apps/wordpress/htdocs/wp-config.php
define(‘WP_HOME’, ‘http://www.website.com’);
define(‘WP_SITEURL’, ‘http://www.website.com’);
Links
Amazon Web Services
http://aws.amazon.com/
AWS Management Console
http://aws.amazon.com/console/
Bitnami Wordpres Stack
http://bitnami.org/stack/wordpress
OpenSSH
http://www.openssh.com/
http://sshwindows.webheat.co.uk/
Filezilla
http://filezilla-project.org/
How to Connect to BitNami MySQL Remotely
http://wiki.bitnami.org/cloud/how_to_connect_to_your_amazon_instance#How_to_connect_to_the_BitNami_MySQL_remotely.3f
EMS MySQL Manager
http://www.sqlmanager.net/products/mysql/manager